
6-Week Strength Program For Goalkeepers
Program Introduction
Thank you for taking the time to view and use this exercise program.
The following strength and conditioning program has been designed using a holistic approach with exercises Scientifically-proven to develop the following outcome:
Strength
Give yourself a confidence score out of 10 (0= not confident, 10= maximum confidence) on where you are with your strength. At the end of the program, give yourself another score and let me know if it improves!
Over the next 6 weeks, you will be required to be consistent and disciplined if you want to see results.
Aim to have at least 1, if not 2 of these session per week.
I appreciate this may be difficult with multiple matchdays per week, so do your best and look to progressively overload each week using the Loading Guidance.
Strength is important as it allows us to build the foundations to develop power, which as a goalkeeper is one of the most important performance parameters.
Strength and power have a close relationship. If we can develop strength, it puts us in a great position to develop power.
Take pride in your recovery and nail the basics:
Nutrition
Hydration
Sleep
Happy training!
Farhan :)
Program Disclaimer
Please remember, it is your responsibility to warm-up efficiently and Go Football Academy takes no responsibility in any injuries that occur during or after the timeframe of this exercise program.
The selected exercises must be safely set-up and carried out and the responsibility is on the athlete.
Loading Guidance

Exercise Alternatives

The exercise alternatives are only to be used if athletes are unable to perform an exercise due to equipment/facility limitations.
Please DO NOT select exercises based on preference. Be disciplined and stick to your specific program!
The overhead squat is one of the most challenging lifts, so if you haven’t done it before use a resistance band to get used to the mechanics.
Then use a fixed barbell (small barbell with the rubber ended weights) to get used to the mechanics WITH load.
Once you have comfortably done both with PERFECT form, use a standard olympic barbell. Once you get here, you don’t need much weight at all.
Warm-up
Please ensure you do some wrist activation exercises before Overhead Squats, low weight and high reps (10-12).
This is on top of your usual RAMP protocal warm-up. Raise, Activate, Mobilise/Mobility and Potentiate.
Warm-up sets (1 X 10 @ 30% of 1RM) for first exercises are still mandatory.
Exercise 1
Overhead Squat

Safety/Setup
J hooks should be armpit height
Safety arms removed (if necessary) - if your gym does not have
Find hand grip first by holding by barbell in your hands and pushing your hands out so that your arms are fully extended - use your hip crease to hold the bar momentarily for balance to do this
Remember this placement and re-rack the barbell
Preparation
Walk the barbell out in a normal Back Squat position out of the rack
Grip the bar where you just found your hand placement
Use a push press technique to get the barbell above your head, elbows lockout
Your grip should be as if you’re trying to pull apart the barbell
Pick a spot to keep your eyes fixated on throughout the lift, keep them there
Keep your chest strong, don’t let it collapse
Engage your core (as if you’re about to be punched)
Take a deep breath in and begin descent
Descent
Begin descent and utilise your hip hinge
As you descend, the weight distribution will move towards your heels
Hips should finish just below the knees
Ascent
Maintain a strong grip on the bar and push up with maximum effort
As you begin to ascend, weight distribution will move forwards to the midfoot
Finish/Re-Rack
After the last rep, catch the barbell on your Trapezius (shoulder shelf), soften hips and knees on contact to allow this and reduce injury risk
Exercise 2
Bulgarian Split Squat

Safety/Setup
Find a stable elevated surface to rest your foot up
Face away from the bench/elevation, place the laces of your left foot on the bench and draw your left knee to as close to the bench/elevation and floor as possible
Now create a right angle with your right knee by adjusting your right foot
This is your feet positioning, place a marker next to it or make a mental note
(Repeat for other leg if necessary)
Descent
One dumbbell per hand
Hinge your hip to create the movement
Back knee should move towards the bench/elevation
Descend and keep the weights alongside your calf (as if you’re pulling up/down socks)
Bottom depth at the ankle
Ascent
Drive up through your heel and extend your knee
DO NOT fully extend the knee at the top of the lift, this loses tension and increases injury risk.
Slight bend of knee at top is fine
Exercise 3
Lateral Squat

Safety/Setup
Hold the dumbbell with ends facing the floor and ceiling (Goblet Squat position)
Descent
Take a large stride out to the side
Weight distribution should be through your hip, knee and heel at the bottom of the lift
Ascent
Push back up by extending your knee and returning to standing position
Exercise 4
Glute Bridge
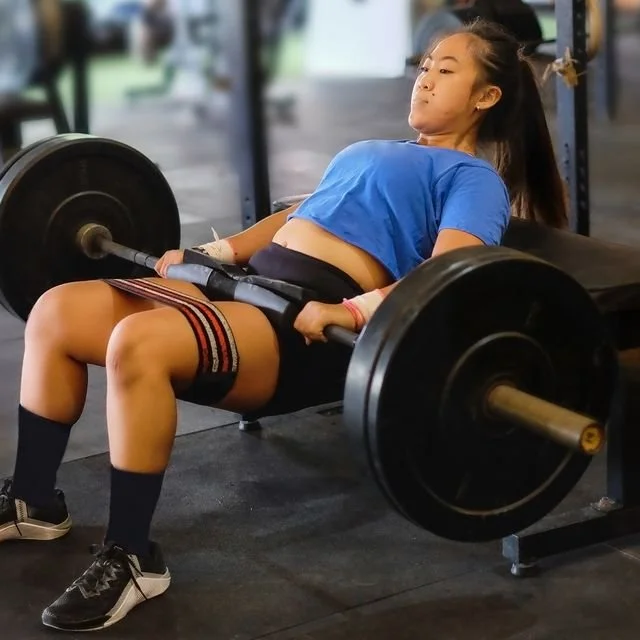
Safety/Setup
Rest the bottom of your scapula (shoulder blades) on a bench or step
Rest the barbell just below your hip bone
Back flat, not slouched
Shins should be perpendicular (vertical) to the floor
The starting position for the set is not from the floor
Bring the barbell up to where your hips are just below your knees
Ascent
Push through with your glutes and pause slightly at the top
Your knees should remain vertical throughout ascending
Your hips should be slightly above your knees at the top of the lift
Descent
Control the weight back down as slowly as you can until you reach the starting position again
Pause, go again
Want the program on your phone? Download it here…
Enjoy this content? Check out my other blog posts here…